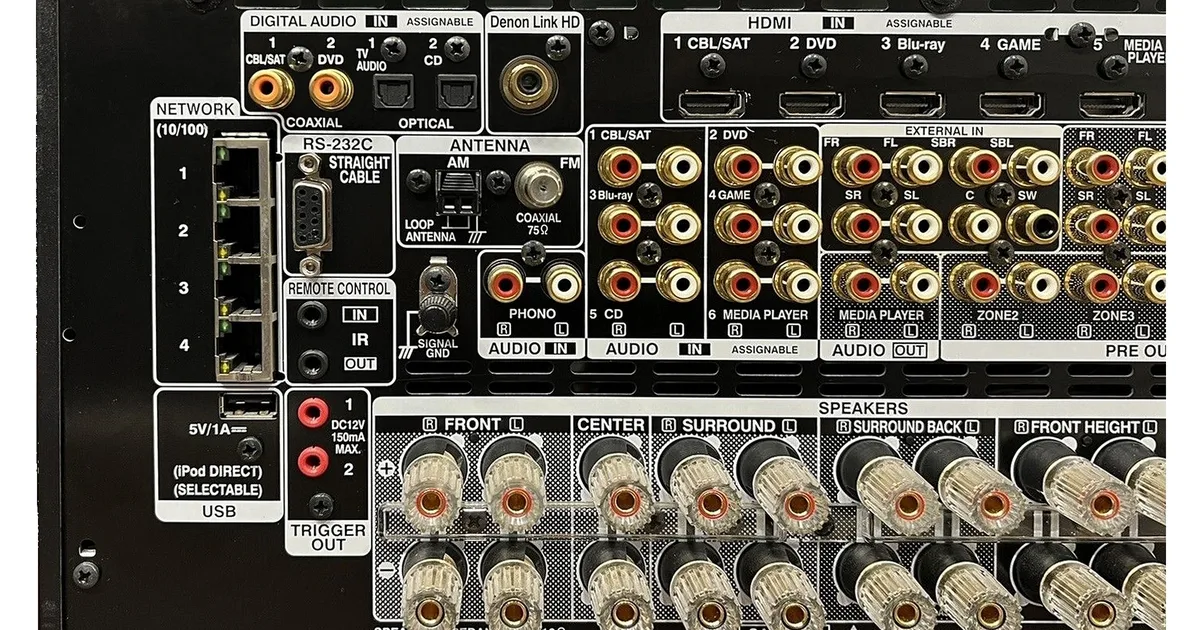
The cheapest whole house audio zone I ever added was already sitting in my rack. My living room receiver had a pair of binding posts labeled Zone 2 that I ignored for three years. One afternoon and a spool of speaker wire later, the kitchen ceiling speakers were playing music, at their own volume, from a different source than the TV room. No new amplifier, no new app, no new subscription.
It is also the zone I eventually replaced, and that is the useful part of this story. Zone 2 is a great free second room and a poor foundation for a real multi-room system. This post covers how Zone 2 actually works, the limits nobody mentions on the box, how I wired mine, and the exact point where I would stop and buy a streamer instead.
If you are still deciding which platform to build around, start with my best whole home audio systems guide. This is the deep dive for people who already have a receiver and want to know what it can do before they spend money.
How Zone 2 actually works
Most mid-range AV receivers from Denon, Marantz, Yamaha, Onkyo, and Sony have some form of Zone 2. It comes in two flavors, and the difference matters.
Powered Zone 2. The receiver reassigns two of its own amplifier channels, usually the surround back or the front height channels, to a second pair of binding posts. You run speaker wire from those posts to passive speakers in another room. No extra hardware. This is the “free” version.
Line-level Zone 2 (preouts). The receiver sends an unamplified signal out of a pair of RCA jacks. You connect those to a separate stereo amplifier near the receiver, or to an amp in the other room. You keep all your surround channels, but you have to buy and power an amp.
Either way, Zone 2 gives you a second room that can play a different source, at a different volume, turned on and off on its own. Most receivers let you control it from the remote, the front panel, and the manufacturer app: HEOS on Denon and Marantz, MusicCast on Yamaha.
On a current entry receiver like the Denon AVR-X1800H or the Yamaha RX-V6A, powered Zone 2 is standard. Preouts tend to show up a step higher in the lineup. Check the rear panel and the manual before you plan around either one.
The limits nobody puts on the box
Here is where Zone 2 stops feeling free. I hit every one of these.
It probably cannot play your TV. This is the big one. On many receivers, Zone 2 can only play analog inputs and built-in network sources. HDMI inputs, including the TV’s ARC or eARC audio, often cannot be routed to Zone 2, or only as downmixed PCM on certain models. If your goal is “hear the game in the kitchen,” read the manual’s Zone 2 source table first. My whole house audio with TV and HDMI ARC guide covers the workarounds.
It costs you surround channels. Powered Zone 2 borrows amplifier channels. On my receiver, assigning the back surround amps to Zone 2 turned a 7.1 setup into 5.1 permanently. On some receivers the channels are shared dynamically, so the main room drops channels only while Zone 2 is on. Either way, you are trading theater for music.
Both rooms often share the network source. If the main room is playing Spotify through the receiver’s built-in streaming, Zone 2 frequently has to play the same Spotify stream or pick a different input entirely. Two people in two rooms with two different Spotify accounts is usually not possible on one receiver.
Volume limits are on you. Zone 2 volume is independent, but the receiver does not know the kitchen speakers are rated for 50 watts. Set a maximum volume for Zone 2 in the setup menu. Every receiver I have used has the option, buried somewhere.
The receiver has to be on. Zone 2 lives inside the receiver. If the receiver is in standby or eco mode, so is the kitchen. That means the receiver idles hotter and draws more power than a small streamer would for background music.
How I wired mine
My setup was simple: receiver in a living room cabinet, a pair of in-ceiling speakers in the kitchen about 35 feet of cable away through a basement ceiling.
- Pick the right wire. For 35 feet, 16 gauge CL2 in-wall speaker wire is plenty. Go to 14 gauge past about 50 feet. If the cable goes inside walls or ceilings, the CL2 or CL3 rating is not optional; it is the fire code.
- Run it from the cabinet down to the basement and back up. A drill, a flex bit, and fish tape did the work. I left a service loop at each end.
- Assign the amplifier channels. In the receiver’s setup menu, under amplifier assignment, I switched the surround back channels to Zone 2. Every brand words this differently. Denon calls it “Amp Assign”; Yamaha calls it “Power Amp Assign.”
- Set the Zone 2 volume cap. Before playing anything, I set a maximum level well below the receiver’s top end.
- Check sources. I confirmed HEOS, AirPlay, and the turntable’s analog input all worked in Zone 2. The TV did not. That was fine for a kitchen, which mostly wanted podcasts and cooking music.
If you are reusing old ceiling speakers left by a previous owner, my guide to reusing in-ceiling speakers covers testing them before you commit to a wire run.
Daily life with Zone 2
For about a year, it worked well. My wife opened the HEOS app, picked Kitchen, and played music. The living room could watch TV at the same time. Volume was independent. Sound quality from a proper receiver amp into decent ceiling speakers was better than the smart speaker it replaced.
The cracks showed when we wanted more. We wanted the dining room too. We wanted the kitchen and the deck grouped for a party. We wanted Home Assistant to start music when someone walked into the kitchen in the morning. And we wanted the TV audio in the kitchen during football season.
A receiver gives you two, maybe three zones, and only one of them is good. Every new request meant fighting the receiver’s limits instead of adding a room.
When to stop and buy a streamer instead
This is the decision rule I would give a friend.
Use Zone 2 if you need exactly one more room, the receiver is already in a cabinet with a reasonable wire path to that room, you mostly want streaming music or radio there, and you do not care about TV audio or surround back channels.
Skip Zone 2 and buy a streamer if you want three or more rooms, grouping, different people controlling different rooms from their phones, Home Assistant automations, or a room the receiver cannot reach by wire.
The streamer I reach for is the WiiM Pro Plus feeding the receiver’s analog or optical input, plus a WiiM Amp in each additional room with passive speakers. Each WiiM is its own zone, they group cleanly, they work with AirPlay, Spotify Connect, and Chromecast-style casting, and they show up in Home Assistant as normal media players. That is what replaced my kitchen Zone 2, and the receiver went back to being a full 7.1 theater. My six-zone WiiM build walks through the whole layout.
There is a middle path. If you own a Denon or Marantz receiver, HEOS lets the receiver’s main zone and Zone 2 join groups with other HEOS speakers. That can stretch a receiver-centered system a bit further, and it is the reason I rank HEOS as the right pick for existing Denon owners in my Sonos vs HEOS vs WiiM comparison. It still does not fix the TV-source limit.
Cost check
Here is the honest math for a second room.
| Approach | Extra hardware | Rough added cost |
|---|---|---|
| Powered Zone 2 | Wire only | $40 to $80 in wire and plates |
| Line-level Zone 2 | Wire plus a stereo amp | $150 to $350 |
| WiiM Amp in the room | WiiM Amp plus short wire | about $300 |
| All-in-one smart speaker | Speaker only | $100 to $250 |
Powered Zone 2 is unbeatable for one room. By the third room, every path costs real money and the streamer path is the one that scales. For a whole-house budget, see my whole house audio cost-per-room guide.
The Bottom Line
If your receiver has Zone 2 and you want music in one more room, use it. Run 16 gauge in-wall wire, assign the spare amp channels, cap the volume, and you have a real second zone for the price of cable. It is the best free upgrade hiding on most receivers.
Just go in knowing the limits: no TV audio on many models, fewer surround channels, shared streaming, and a hard ceiling of two or three rooms. The moment you want a third room, grouping, or automations, stop extending the receiver and add a WiiM Pro Plus or WiiM Amp per zone instead. For the full platform comparison, head back to my best whole home audio systems guide.