Every whole house audio project I have planned eventually gets the same request: “Can it play on the patio too?” The answer is yes, and the patio is usually the easiest zone in the house to get right, because outdoor speakers are cheap, the wiring path is short, and nobody cares about perfect stereo imaging while flipping burgers. It is also the zone people get wrong most often, because they treat it like an indoor room that happens to be outside.
This guide is the outdoor companion to my best whole house audio systems guide. I am assuming you already have, or are about to pick, a multi-room platform. I will use WiiM for the examples because it is what I run, but the same plan works with a Sonos Amp or a HEOS amplifier. The steps are the same: pick a dedicated zone, run the right wire, mount the speakers where people sit, and set a volume ceiling before the neighbors set one for you.
Step 1: Make the patio its own zone
The most common shortcut is an A/B speaker switch on the living room receiver. It looks tidy, and it costs twenty dollars. It is also the reason so many patio speakers end up unused. With an A/B switch, the patio can only play whatever the living room is playing, at a volume tied to the living room knob. If someone is watching a movie inside, the patio is dead. If the kids want music outside while you work inside, it is dead again.
A real zone fixes all of that. The patio gets its own streaming amplifier, it shows up in the app as “Patio,” and it can play alone, join the kitchen for a party, or sit quiet. In practice that means one of three setups:
- WiiM Amp (my pick). Around $300, 60 watts per channel at 8 ohms, AirPlay 2, Chromecast, Spotify Connect, and WiiM grouping with the rest of the house. Plenty for a pair of 4.5 to 6.5 inch outdoor speakers. Check the WiiM Amp on Amazon.
- Sonos Amp. More power and a much higher price. Worth it only if the rest of the house is already Sonos, because a Sonos patio cannot group with a WiiM kitchen.
- A spare channel on a multi-zone amp. If you already run a centralized rack, a free zone on a Juke or similar amp is the cheapest option of all.
Whatever you choose, stay on one platform. The wired vs wireless whole house audio decision matters less than this one: mixing ecosystems is what breaks synchronized playback.
Where does the amp live? Indoors, always. A WiiM Amp in a garage, mudroom cabinet, or the closest closet to the patio wall is ideal. It needs Wi-Fi or Ethernet, ventilation, and a short trip through the exterior wall. Do not put a consumer streaming amp in an outdoor box. Condensation and summer heat will kill it.
Step 2: Pick passive outdoor speakers, not wireless ones
Battery and Wi-Fi outdoor speakers are tempting, and for a small balcony they are fine. For a patio or deck you will use for a decade, passive wired speakers win on every axis that matters. They have no electronics to fail in the cold, no firmware to go out of support, and no batteries to swell in August sun. A good pair costs less than one premium wireless speaker.
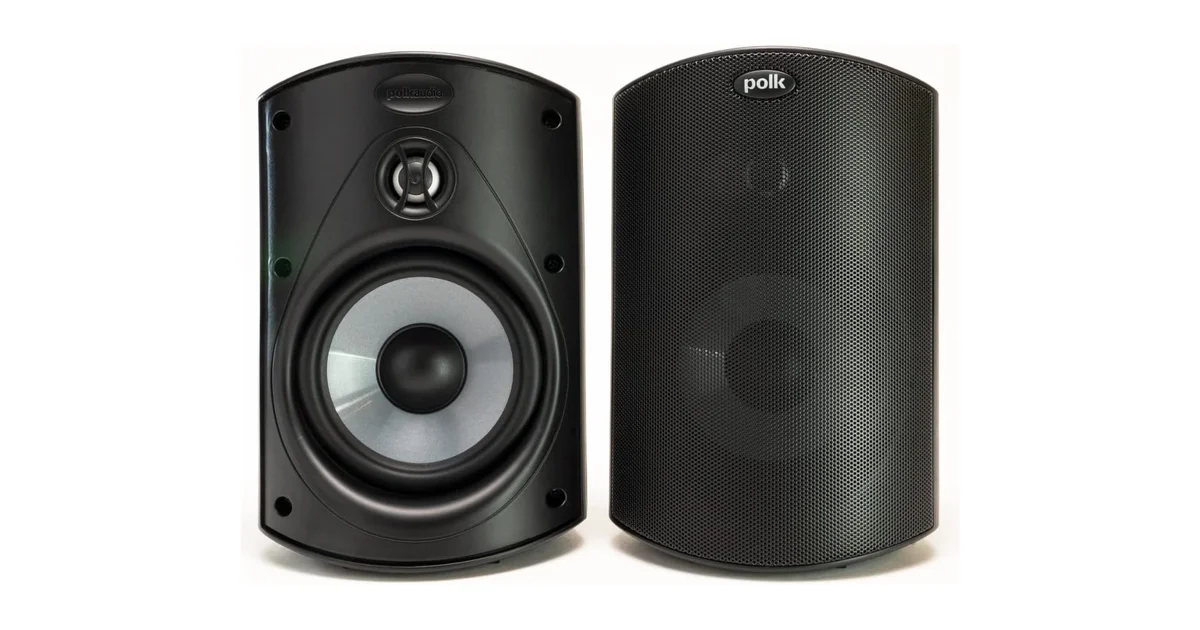
My default recommendation is the Polk Audio Atrium 4. It is a 4.5 inch two way with an aluminum dome tweeter, a weather rated bass reflex cabinet, and a bracket that lets you angle the speaker down toward the seating area. It sounds fuller than its size suggests, it comes in black and white so it disappears against siding or trim, and it is a common sight on decks that have been through years of New England winters. Check the Polk Atrium 4 pair on Amazon.
If the patio is large or you want real bass for a party, step up to a 6.5 inch outdoor model rather than a third speaker. For a big yard, the better answer is a second pair on the same zone, not one pair turned up louder. I will cover that in the placement section.
Three specs matter when you shop:
- Impedance. Stick with 8 ohm speakers unless the amp explicitly supports 4 ohm loads continuously. Two 8 ohm pairs wired in parallel make 4 ohms, which is the limit for most compact amps.
- Weather rating. Look for a stated IP rating or explicit “all weather” testing for UV, salt, and freezing. Covered patios are easier on speakers than fully exposed ones.
- Mounting bracket. A bracket that tilts and swivels is worth more than an extra inch of woofer. Aim is the whole game outdoors.
Step 3: Run the wire the boring, correct way
Outdoor wiring is where a weekend project turns into a callback. The rules are simple:
| Run length (8 ohm) | Wire gauge | Notes |
|---|---|---|
| Under 50 ft | 16 AWG | Fine for most patios off the back wall |
| 50 to 100 ft | 14 AWG | Typical for a deck or pergola away from the house |
| Over 100 ft | 12 AWG | Or move the amp closer |
Inside walls, use CL2 or CL3 rated in-wall speaker wire; code cares about this. Anything that runs along the ground or gets buried should be rated for direct burial, or should run in conduit. Ordinary speaker wire in a garden bed lasts about two seasons before the jacket cracks and water wicks into the copper. Direct burial 14 gauge wire on Amazon costs a few dollars more than the indoor kind and saves redoing the job.
At the exterior wall, drill a slightly upward sloping hole from inside to outside so water runs away from the house, add a drip loop in the cable just below the entry, and seal the penetration with exterior silicone or a proper low voltage wall plate with a gasket. At the speaker end, leave another drip loop so water running down the cable falls off before the terminals. These two loops prevent most of the corroded terminal failures I see.
Label both ends. “Patio L” and “Patio R” written on tape inside the closet saves ten minutes of guessing later when someone swaps the amp.
Step 4: Mount for where people sit, not where it looks symmetrical
Indoor speaker placement is about the listening position. Outdoor placement is about coverage and spill. Sound outside has no walls to reflect from, so it falls off fast and travels sideways toward the neighbors.
My rules:
- Height: 8 to 10 feet, typically right under the eave or soffit. The overhang protects the speaker, and height spreads sound evenly across the seating area.
- Angle: tilt down toward the table or the chairs. The bracket matters more than anything else in the box.
- Spacing: 8 to 12 feet apart. Wider than that and the middle of the patio goes hollow.
- Direction: point toward your house and yard, not across the fence. Speakers on the back wall firing into your own lawn are kinder to neighbors than speakers on a post firing toward the house.
Mount stereo pairs if people sit centered between them. On a long deck or wraparound porch, you get better results by setting the zone to mono and spacing speakers along the length. WiiM exposes a left, right, or stereo setting for the amp output, so you can run both channels as mono without rewiring.
For a large yard, add a second pair on the same amp in parallel (watch the 4 ohm floor) or give the far end its own zone. Turning one pair up to reach the back of the lawn is how the patio gets too loud and the lawn still sounds thin.
Step 5: Set a volume ceiling and a schedule
This is the step most installers skip, and it is the one that keeps a patio zone friendly. Outdoor speakers get turned up because sound disappears outside. Neighbors hear it anyway.
In the WiiM Home app, set a maximum volume for the patio zone. I keep mine at about 60 percent, which is loud enough for a party on the deck and still polite at the property line. If guests or kids use AirPlay, the ceiling still applies, because it is enforced at the amp.
If you want a physical control outside, a weatherproof impedance matching volume knob mounted by the door works with any passive setup. Outdoor speaker volume controls on Amazon. The knob only lowers volume from whatever the amp sends, so the app ceiling remains the real limit.
If you run Home Assistant, the patio becomes a media player entity like the rest of the house. My WiiM and Home Assistant multi-room guide covers the integration; for the patio I add two automations: stop the patio zone at 10 p.m. on weeknights, and pause it when the back door camera sees nobody outside for 30 minutes. Both prevent the “music played to an empty yard all night” problem.
What a patio zone actually costs
Here is the realistic budget for a single covered patio, assuming the rest of the house already runs WiiM:
| Item | Typical price |
|---|---|
| WiiM Amp | about $300 |
| Polk Atrium 4 pair | about $150 to $200 |
| 50 ft of 14 AWG in-wall or burial wire | $30 to $50 |
| Wall plate, sealant, mounting hardware | $20 |
| Optional outdoor volume knob | $40 to $60 |
That is roughly $500 to $600 for a zone that groups with the rest of the house, compared with $400 or more for a single premium wireless outdoor speaker that will need charging or an outdoor outlet. It also lines up with the numbers in my whole house audio cost per room guide: outdoor zones are among the cheapest rooms to add because the speakers are inexpensive and there is no drywall to patch.
Winter: what to do with outdoor speakers
Weather rated passive speakers can stay up all year. I do not take mine down, but I do three things each fall:
- Check the drip loops and terminal connections for green corrosion.
- Confirm the brackets are still tight. Freeze and thaw cycles loosen screws in siding.
- Leave the zone in the app, but exclude it from “everywhere” groups so a winter party playlist does not blast an empty, frozen deck.
The amp stays indoors and needs nothing. That is the payoff of keeping the electronics inside.
Mistakes I would avoid
- Tapping the indoor receiver with an A/B switch. It saves money and removes the reason you built a whole house system.
- Using indoor bookshelf speakers under the eave. Paper cones and MDF cabinets swell and fail within a year.
- Running regular speaker wire across the lawn. Use direct burial wire or conduit.
- Mounting speakers on a fence facing the house. It sounds fine to you and loud to the neighbor behind the fence.
- Skipping the volume ceiling. Someone will eventually turn it to 100 percent from a phone.
The Bottom Line
Treat the patio as a real zone, not an extension of the living room. A WiiM Amp indoors, a pair of Polk Atrium 4 speakers under the eave, the correct gauge of outdoor rated wire with drip loops at both ends, and a volume ceiling in the app will give you an outdoor zone that groups with the house, survives winters, and stays on good terms with the neighbors. It is one of the cheapest and most used upgrades in any whole home audio system. If you are still choosing the platform the patio will join, start with my best whole house audio systems guide, then come back and add the patio.