My house has one thermostat. It sits in the front hall, a spot that is warm, draft free, and almost perfectly unrepresentative of every room people actually sleep in. For years the thermostat said 68 and my kids said their rooms were freezing, and I assumed they were exaggerating.
They were not. The first night I had a Zigbee temperature sensor in every room, the back bedroom read 61.8 while the hall thermostat smugly reported 68. The kitchen hit 74 every evening from the oven and the afternoon sun. The house was not one temperature. It was a dozen microclimates and the thermostat could only see one of them.
This is how I put a cheap Zigbee sensor in every room, which ones I use, how I graph the whole house in Home Assistant, and what I actually changed once I could see the data. If you are still picking a coordinator and building out your network, start with my best Zigbee devices for Home Assistant guide. This post is the deep dive on the sensor I own more of than any other, used for one specific job: mapping heat across the house. (For the broader sensor-by-sensor comparison, see my Zigbee temperature and humidity sensor guide.)
Why one thermostat lies to you
A thermostat measures exactly one spot in the house and runs the heat until that spot is happy. Everything else is a guess. In older houses, especially ones with hot water radiators or long duct runs, the gap between the warmest and coldest occupied rooms is routinely five to eight degrees in January.
The usual culprits:
- Rooms over unheated space. Bedrooms above a garage or a porch lose heat through the floor.
- North and corner rooms. Two exterior walls and no afternoon sun.
- Long pipe or duct runs. The last radiator on the loop gets the coolest water; the last register gets the weakest airflow.
- Heat sources near the thermostat. A sunny window, a lamp, or a kitchen nearby makes the thermostat satisfied early, and the rest of the house never catches up.
You can feel this, but you cannot fix what you cannot measure. A sensor in each room turns “the back bedroom is cold” into a graph you can act on and, later, an automation you can trust.
The sensors I actually use
I have tried most of the cheap Zigbee temperature sensors. These are the ones still on my walls.
SONOFF SNZB-02D: my default for every room
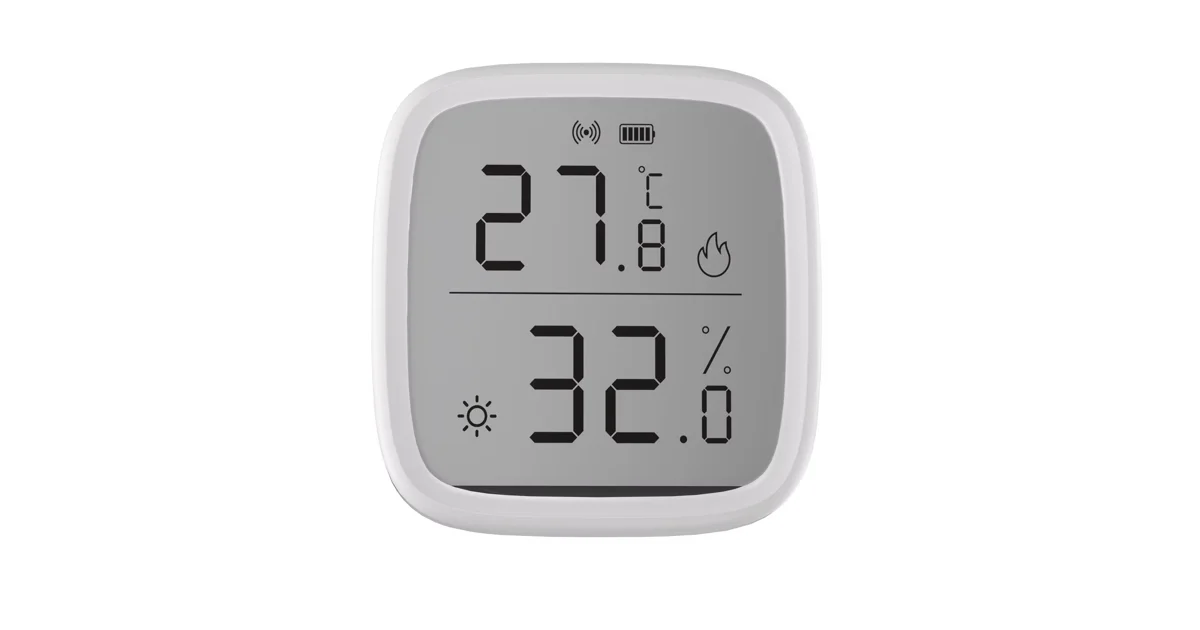
The SONOFF SNZB-02D (code JPK, or on Amazon) is the one I buy in multipacks. It has a small LCD, so anyone walking past can read the room without opening an app, and that matters more than I expected. My kids check it before complaining now, which is its own small victory.
It pairs cleanly with both Zigbee2MQTT and ZHA, reports temperature and humidity, and runs about a year on a CR2450 coin cell in my house. Out of the box mine agreed with each other within about 0.5 degrees Fahrenheit. It also sits flat on a shelf or sticks to a wall with the included adhesive, which makes moving it around during the “where is the cold spot” phase easy.
SONOFF SNZB-02P: when you do not want a screen
In bedrooms where any visible readout is unwelcome, I use the SNZB-02P (code JPK, Amazon fallback). It is the same idea in a tiny square with no screen. The LCD on the 02D does not light up, to be clear, but a blank little square disappears on a bookshelf in a way a readout never does.
SONOFF SNZB-02LD: the probe for odd places
For the spots where a room sensor will not fit, like the inside of a chest freezer, a crawl space duct, or the supply pipe coming off the boiler, I use the SNZB-02LD (code JPK, Amazon). The body stays outside with the radio and screen; the wired probe goes where it is cold or wet. Taping the probe to a radiator supply pipe gives you a cheap “is the boiler actually running” signal, which I lean on in my heating failure detection setup.
Aqara temperature sensor: the accurate one
Aqara’s temperature and humidity sensor also reports barometric pressure and, in my testing, is slightly more accurate out of the box. It runs on a CR2032 and is fussier about which router it parents to, so it works best once your mesh is already solid. I keep one in the main living space as my reference sensor.
Placement: the part everyone gets wrong
A temperature sensor measures whatever is closest to it. Put it on top of the TV and you are graphing the TV. My rules, learned by moving sensors around for two weeks:
- Interior wall, four to five feet up. Roughly where a thermostat would go, and roughly where your body is when you are sitting or standing.
- Away from heat and cold sources. At least three feet from radiators, registers, windows, and exterior doors. Never in direct afternoon sun.
- Not on electronics. Routers, TVs, game consoles, and chargers all run warm.
- One in an unheated reference spot. I keep one in the garage and one on the covered porch. Comparing a bedroom to the outdoor temperature is how you spot a room that loses heat faster than the others.
If a reading looks wrong, move the sensor before you change the furnace. Half my early “cold room” findings were really “sensor next to a drafty window” findings.
Your mesh decides whether this works
Every one of these sensors is a sleepy battery end device. It wakes up, reports, and goes back to sleep, and it depends on a nearby router to hold messages for it. The far bedrooms are exactly where your mesh is weakest, which means the sensors you care most about are the ones most likely to drop off.
Before I spread sensors around the house, I put a powered Zigbee plug in a hallway on each floor. That alone fixed the “back bedroom went unavailable overnight” problem. I wrote up the whole approach, including which plugs route well, in Zigbee smart plugs as mesh routers, and the battery side in Zigbee battery sensor reliability. If your coordinator is an older stick, the best Zigbee coordinators post covers upgrades that do not require re-pairing everything.
Calibrate before you trust the graph
Cheap sensors are consistent but not perfectly accurate. Before mounting anything, I lay every sensor on the same table for an hour, away from vents, and compare readings in Home Assistant. Most land within half a degree. Anything further out gets an offset.
In Zigbee2MQTT, each SONOFF and Aqara sensor exposes a temperature_calibration setting on its device page; set it to the difference from your reference. In ZHA, there is no universal offset, so I wrap the raw entity in a template sensor:
template:
  - sensor:
      - name: "Back Bedroom Temperature"
        unit_of_measurement: "°F"
        device_class: temperature
        state_class: measurement
        state: >
          {{ (states('sensor.back_bedroom_raw_temperature') | float(0) - 0.6) | round(1) }}
        availability: >
          {{ has_value('sensor.back_bedroom_raw_temperature') }}
The availability line matters. Without it, a dropped sensor shows up as a fake reading of minus 0.6 degrees and wrecks your averages.
Graph the whole house on one card
The payoff is one history graph with every room on it. A plain History card with all the room sensors, set to 48 hours, is enough to see the pattern immediately: which rooms track the thermostat, which lag behind, and which crash overnight.
I add two derived sensors on top. The first is a house average, using the built-in Min/Max helper (Settings, Devices and Services, Helpers, Combine the state of several sensors) set to “mean” across the bedrooms. The second is the spread, the gap between the warmest and coldest occupied room:
template:
  - sensor:
      - name: "House Temperature Spread"
        unit_of_measurement: "°F"
        state_class: measurement
        state: >
          {% set rooms = [
            states('sensor.back_bedroom_temperature'),
            states('sensor.front_bedroom_temperature'),
            states('sensor.kids_room_temperature'),
            states('sensor.living_room_temperature')
          ] | select('is_number') | map('float') | list %}
          {{ (rooms | max - rooms | min) | round(1) if rooms | count > 1 else none }}
The spread is the number I actually watch. Mine started at 7.4 degrees on cold mornings. Anything over 4 tells me something is off, whether that is a radiator that needs bleeding, a window someone cracked open, or a zone valve that stuck.
What I changed once I could see it
Data is only interesting if it changes something. Here is what the sensors led to in my house, in order of payoff:
- Bled the radiators on the far end of the loop. The back bedroom radiator was half full of air. Fifteen minutes with a radiator key closed most of the gap. Free.
- Moved what the thermostat “sees.” My thermostat supports a remote sensor, so overnight it now follows the average of the bedrooms instead of the front hall. The hall gets a little warmer at night; the kids stop waking up cold.
- Weatherstripped two windows. The cold-room sensor dropped faster than its neighbors every windy night. A $12 roll of foam tape fixed it.
- Lowered the daytime setpoint by a degree. Once I trusted the average, I could see the main rooms were actually overshooting during the day. That saved more on the gas bill than the sensors cost.
If your thermostat is locally controllable, you can go further and have Home Assistant drive it from the room averages. My local thermostat control post covers that side.
One automation worth adding
Most nights I do not look at the graph. Home Assistant looks for me. This alert fires when any bedroom stays under 63 for twenty minutes during sleeping hours:
automation:
  - alias: "Cold bedroom alert"
    trigger:
      - platform: numeric_state
        entity_id:
          - sensor.back_bedroom_temperature
          - sensor.front_bedroom_temperature
          - sensor.kids_room_temperature
        below: 63
        for: "00:20:00"
    condition:
      - condition: time
        after: "22:00:00"
        before: "07:00:00"
    action:
      - service: notify.mobile_app_phone
        data:
          message: "{{ trigger.to_state.name }} is {{ trigger.to_state.state }}°F"
It has caught a boiler that locked out on a cold night, a door left ajar, and a kid who opened a window “for fresh air” in January.
What this costs
For my house: nine SNZB-02D sensors, two SNZB-02P for the bedrooms that did not want a screen, one SNZB-02LD on the boiler supply pipe, and one Aqara reference. Roughly $170 all in, plus about $40 of Zigbee plugs I would recommend anyway. The radiator bleeding and setpoint change paid that back in one heating season.
The Bottom Line
A thermostat tells you how warm one hallway is. A Zigbee temperature sensor in every room tells you how warm your house is, and that is the only number that matters to the people sleeping in it.
My pick is the SONOFF SNZB-02D for nearly every room (code JPK; Amazon works too). It is cheap, accurate enough after a quick calibration, pairs cleanly with Zigbee2MQTT and ZHA, and the screen earns its keep. Use the screenless SNZB-02P where a readout would bother someone, the SNZB-02LD probe for pipes and freezers, and one Aqara as your reference.
Build the mesh first, calibrate on a table, mount on interior walls, and watch the spread. Your coldest room will tell you exactly what to fix.