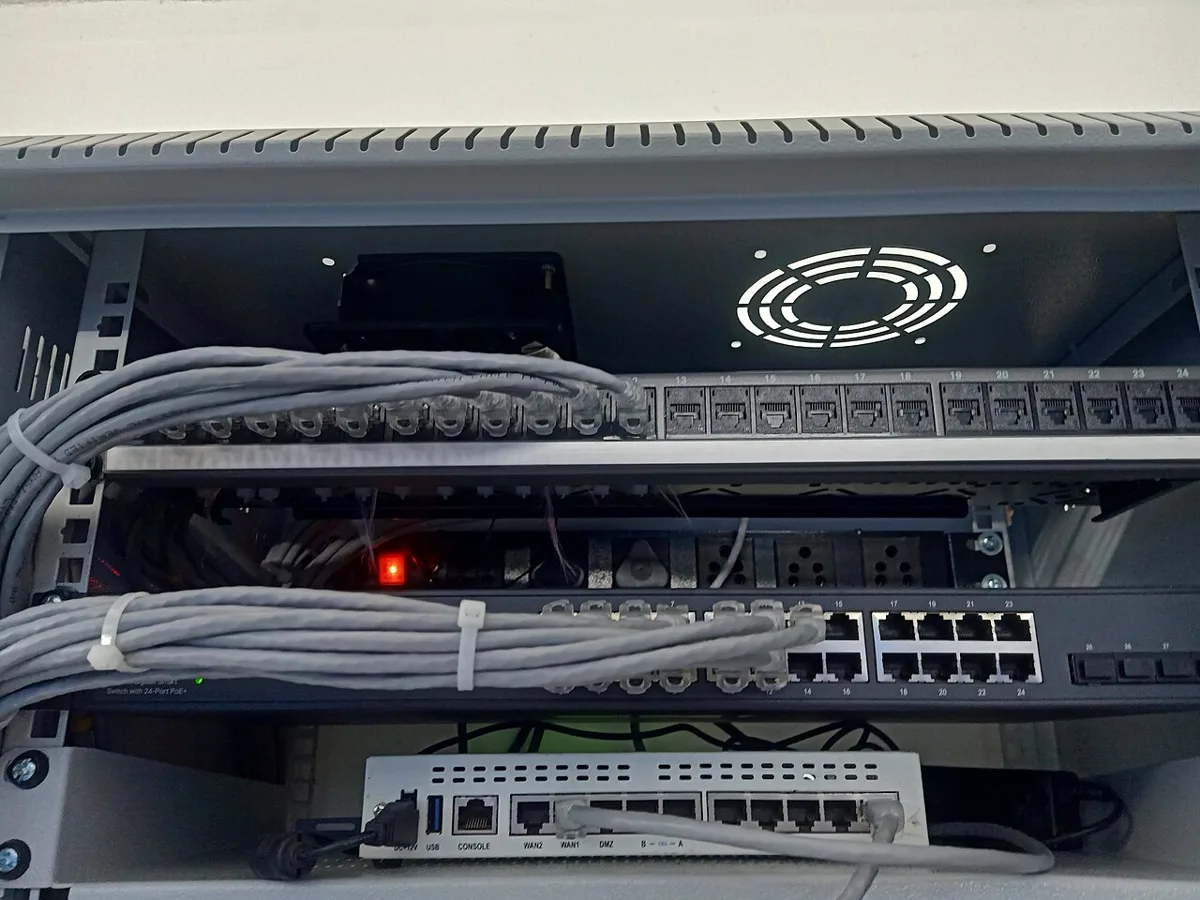
A home lab does not have to look like a server closet to be a real home lab. Mine lives on a shelf in my office, it is about the size of a large toaster oven, and you would walk past it without noticing unless I pointed it out. It runs Home Assistant, a Plex server, the arr stack, a reverse proxy, and a dozen other containers, and the loudest thing in the room is still the keyboard I am typing this on.
That is the whole point of a 10 inch mini rack. It gives you the organization, cooling, and clean cabling of a real rack without the noise, the heat, the floor space, or the divorce paperwork of a full 42U enterprise cabinet in the living room. This is the build log I wish I had read before I started: what rack I chose and why, how I made it genuinely quiet, how I handled power and cable management, and the two mistakes I made so you can skip them.
Why 10 Inch, Not Full Width
The first fork in the road is rack width, and it matters more than any other decision. A standard rack is 19 inches wide, sized for enterprise gear. A mini rack is 10 inches wide, sized for exactly the kind of hardware a home lab actually runs today: mini PCs, compact switches, small NAS units, single board computers.
I went 10 inch because my lab is built on mini PCs, and I want to be honest about the tradeoff. You cannot mount a full-depth Dell PowerEdge or a big drive shelf in a 10 inch rack. If your dream is a wall of blinking enterprise servers, this is not your build. But if you have looked at your actual hardware and it is a couple of small nodes plus a NAS, a 19 inch rack is mostly empty air, wasted floor space, and an invitation to fill it with power-hungry gear you do not need. The mini rack forces a healthy discipline: it fits the lab you have, not the lab you fantasize about at 1am on the homelab subreddit.
The other reason is domestic peace. A 10 inch rack sits on a shelf or a desk. It does not dominate a room. That single fact is what let my lab live in the open instead of exiled to a hot closet, and a lab you can see and reach is a lab you actually maintain.
The Rack I Chose: DeskPi RackMate T1
After reading through more mini rack threads than I care to admit, I bought the DeskPi RackMate T1, and it is the pick I would make again. It is the enthusiast default for good reasons.
It is aluminum, so it is light enough to pick up with one hand and move to wherever you are working, then set back on the shelf. The build quality is genuinely nice, the kind of thing that does not feel like a compromise sitting on a desk. The depth posts are adjustable, which matters more than you think when you are mounting gear of different sizes. And it looks clean. That sounds like a soft reason until you remember this thing is going to sit in your field of view every day.
It is not the cheapest option. A Lanberg or Navepoint style budget cabinet will save you money, and if the rack is going in a closet where nobody looks, that is a perfectly rational choice. But for a rack that lives in the open, the DeskPi earns its premium. This is the same calculus I apply to the mini PCs that go in it: buy the nice version of the thing you touch and see every day, save money on the things hidden in the back.
Making It Quiet: The Part Everyone Gets Wrong
Here is the counterintuitive truth about a quiet rack: the quiet does not come from the rack. It comes from what you refuse to put in it. You cannot silence a screaming 1U server with a fancy enclosure. You prevent the scream by never buying the 1U server in the first place.
My rack is near silent because every device in it is quiet at the source. The compute is mini PCs, which idle around 10 watts and either run fanless or spin a single small fan so slowly you cannot hear it. The NAS sits on a shelf and its fan is a large slow unit. There is no enterprise gear with 40mm fans doing 12,000 RPM to move air through a shallow chassis. That is the entire secret, and it is a buying decision, not a cooling trick.
When you do need to add airflow, and in a warm room you might, the rule is large and slow beats small and fast. Fan noise climbs sharply with RPM, and a bigger blade moves the same volume of air at a much lower speed. I added a single Noctua NF-A8 80mm fan running at low RPM off the rack to pull warm air up and out, and it is inaudible from across the room while keeping temperatures flat. A cheap 40mm fan spinning fast would have moved less air and howled doing it.
One more quiet decision: I skipped the glass door. An enclosed cabinet with a sealed front looks slick in photos, but it traps warm air and forces whatever fans you have to work harder, which means more noise and higher temperatures. An open frame like the DeskPi breathes naturally. If you value silence and cool running over the closed-cabinet look, leave it open.
Power: One Clean Strip Instead of a Wall of Warts
The fastest way to make a mini rack look like a disaster is to run every device to its own wall wart on a power strip dangling off the back. The fix is a 10 inch rack PDU, a horizontal power strip that mounts in a single U of rack space with its outlets facing the back where your cables already live.
It is a small upgrade and not strictly required, but once you have more than two or three devices it turns a tangle into one tidy horizontal line. I mounted mine at the bottom of the rack so every power cable drops down to it instead of crossing the frame.
The one power component I would prioritize over the PDU is a UPS. A mini rack full of mini PCs and a NAS is exactly the kind of always-on gear that a two-second brownout can corrupt mid-write, and a UPS both rides out the flicker and shuts the lab down cleanly on a real outage. I wrote a full guide on sizing a UPS for a NAS or home server, and it is the first accessory I would buy for any rack, before the PDU, before the cable management, before anything cosmetic.
Cable Management That Takes Ten Minutes
Cable management in a mini rack is not a dark art. It is a 1U shelf, a short patch panel or a keystone strip if you want ethernet to terminate cleanly, and a roll of velcro cable ties. That is genuinely it.
I put the NAS and any non-rackmount gear on a 10 inch 1U rack shelf so it sits solidly instead of balancing on the frame. I run all the ethernet down one side and all the power down the other, so the two never cross, and I velcro them into loose bundles every few inches. Velcro, not zip ties, because you will be adding and removing gear constantly in a home lab and cutting zip ties every time gets old fast.
The clean cabling connects to the rest of the network through the switch, and if you are speccing that side of the lab, I have separate guides on the 2.5GbE upgrade path for most home labs and the reasons you might step up from there.
Two Mistakes I Made So You Do Not Have To
The first mistake was buying gear before I bought the rack, and then discovering half of it did not fit cleanly. Mini rack depth is shallower than you think, and some devices that look small are surprisingly deep once you account for the cables sticking out the back. Measure your actual hardware, including cable clearance, before you commit to a rack, and check the DeskPi depth spec against your deepest device. I ended up returning a small switch that physically fit but left no room to seat the ethernet cables without crushing them.
The second mistake was going too dense too fast. A mini rack tempts you to fill every U because the space is right there, and I crammed it until airflow got tight and I could not reach anything to service it. Leave a U of breathing room above anything that runs warm, and leave yourself finger room to actually unplug things. A rack you cannot work in is a rack you will resent. I pulled two devices back out, spaced everything with a gap, and the lab has run cooler and been far easier to maintain ever since.
The Bottom Line
A quiet home lab mini rack is not a downgrade from a real rack. For a lab built on mini PCs and a compact NAS, which is how most home labs are actually built in 2026, it is the correct rack. It gives you the organization and clean cabling of a full cabinet without the noise, heat, and floor space, and it lets your lab live in the open where you will actually maintain it instead of hidden in a hot closet.
If I were starting over, I would buy the DeskPi RackMate T1 again, keep the frame open, keep the loudest component a single slow Noctua fan, and spend my accessory money on a UPS before anything cosmetic. Measure before you buy, leave room to breathe and to work, and you will end up with a lab that is capable, quiet, and genuinely nice to have in the room. Fill it with the right mini PC nodes and you have a complete home lab that hides in plain sight.