My sprinklers ran for eleven minutes in a thunderstorm last August. I watched it happen from my kitchen window, standing there with a coffee, while the controller on the garage wall dutifully executed a schedule it had downloaded from a server I do not own. The rain skip did not fire because the cloud service that was supposed to make that decision had decided, that morning, to be slow.
That was the moment I stopped trusting a rented brain to decide when to water my yard.
This is the build log for replacing that cloud controller with a fully local setup: OpenSprinkler on the wall, Home Assistant making the decisions, and not one watering choice that depends on somebody else’s uptime. It reuses every valve already in my yard, it cost less than a year of the “premium” tier my old app kept nagging me about, and it has not watered in the rain since.
Why Not Just Buy a Rachio
The obvious answer is the Rachio 3, and I want to be fair to it because it is a genuinely good product. It is beautiful, the app is excellent, the flex daily schedule that spreads watering to match your soil and plants actually works, and Rachio does not charge a monthly fee for the core features. If you want to install one thing, tap through a friendly setup, and never think about it again, buy the Rachio and stop reading. I mean that.
Here is my problem with it, and with the Orbit B-hyve XR that sits one price tier below it: the intelligence lives in the vendor’s cloud. The controller on your wall is mostly a WiFi relay. The weather intelligence, the schedule optimization, the rain skip logic, all of it is computed on servers and pushed down. The Home Assistant integrations for both are cloud-polling: HA asks Rachio’s API what the sprinklers are doing, and if that API is slow or down or changes, your automation is blind.
That is fine right up until it is not. It is not, in my experience, when a cloud service has a bad morning during a rainstorm. It is not when a company gets acquired and the app you depend on gets a “we are excited to announce” email. And it is not when you simply want the plain guarantee that a decision this dumb (do not water when the ground is wet) executes on hardware in your own garage with no dependency on the internet at all.
I wanted the brain local. That points at OpenSprinkler.
Step 0: Check Your Wiring Before You Buy Anything
Do this before you order, because it decides which model you need and it prevents the single most common return. Go to your existing sprinkler controller, take the cover off, and write down four things:
- Zone count. How many wires land on numbered station terminals? That is your zone count. The OpenSprinkler v3 has 8 zones built in and takes 16-zone expander boards up to 72 total. If you have more than 7 zones, buy an expander at the same time, because a master valve eats a zone slot too (more on that below).
- Is there a common wire? There will be one (sometimes two) wires on a terminal labeled C or COM. This is the shared return for every valve. You will move it to OpenSprinkler’s COM terminal.
- Master valve or pump start? Some systems have a wire on an MV or P terminal that opens a master valve or kicks on a pump whenever any zone runs. Note it. OpenSprinkler handles this in software, but it counts as one of your station slots.
- Transformer voltage. Sprinkler valves are almost universally 24VAC. Look for the transformer (a small block plugged into an outlet, or a wire pair on terminals marked 24VAC). The AC-powered OpenSprinkler v3 expects exactly this. If you have some oddball DC latching valve setup, stop and check the OpenSprinkler docs, because you want the Latch model instead.
Ninety percent of residential systems are 24VAC, one common, one master valve, four to eight zones. If that is you, order the standard OpenSprinkler v3 and, if you are near the zone limit, one expander. Then keep reading.
The Hardware
- An OpenSprinkler v3 controller, around $130. It is sold direct by the maker rather than boxed on a shelf, so a search is the honest link here. This is the whole brain: an ESP32-class board running open firmware with a built-in local web UI and a documented HTTP API.
- Optionally a sprinkler flow meter, around $40, plumbed inline after your backflow preventer. This is the upgrade that turns a sprinkler timer into a leak detector, and it is the reason I would not go back. More below.
- Optionally a wired rain sensor, around $25, if you do not already have one. OpenSprinkler has two sensor ports (SN1 and SN2) and the physical sensor is the local failsafe that does not care about the forecast.
- Your existing valves, wire, and 24VAC transformer, which you keep. That is the beauty of it. The stuff in the ground does not change.
Total for a real install: roughly $130 for the controller alone, or about $200 with a flow meter and rain sensor. Call it one to two years of the “advanced” subscription that a lot of cloud lawn apps are pushing now, paid once, for hardware you own.
Step 1: Swap the Controller
Kill power to the old controller first. Then, and I cannot stress this enough, photograph the existing wiring before you touch a single wire. Get a clear, well-lit shot where you can read which colored wire lands on which numbered terminal. Then label each zone wire with a piece of tape and a number, matching the old terminals.
Now it is mechanical:
- Unscrew each zone wire from the old controller and land it on the matching numbered station terminal on OpenSprinkler.
- Move the common wire (or wires) to OpenSprinkler’s COM terminal.
- If you had a master valve or pump start wire, land it on OpenSprinkler and remember which station number you used, because you will flag it as a master in software.
- Connect the 24VAC transformer to OpenSprinkler’s power terminals (AC power has no polarity, so orientation does not matter).
Power it up. The onboard display and LED tell you it is alive. That is the entire hardware job. If your old wiring was labeled, this is a twenty-minute task.
Step 2: WiFi and Firmware, All Local
OpenSprinkler broadcasts its own WiFi access point on first boot. Join it from your phone, point it at your home WiFi, and it hops onto your network. From there, everything happens in a browser at its local address (it advertises over mDNS, so opensprinkler.local usually just works). There is no account to create and no app to install unless you want the convenience one.
Set a device password in the UI, then recreate your watering setup: define each zone with a friendly name (front lawn, side beds, back drip line), flag the master valve station if you have one, and build your programs. If you had schedules on the old controller, this is where you retype them. It takes a few minutes and it is the last time you will think about the vendor UI, because from here Home Assistant takes over.
While you are in settings, set the weather-based watering method (the Zimmerman algorithm is the sane default) and drop in a free weather API key if you want online forecast scaling. This scales your run times by a percentage based on recent and forecast conditions. It is genuinely useful, and critically, it runs as an adjustment on top of local schedules rather than as a remote brain that owns them.
Step 3: Wire It Into Home Assistant
This is where the local story pays off. Install the hass-opensprinkler integration through HACS, then add the integration and point it at OpenSprinkler’s local IP address and the device password you set. That is the whole configuration. No cloud, no OAuth, no webhook relay through a vendor.
What you get in Home Assistant, immediately:
- A switch entity per zone, so
switch.front_lawnturns that station on and off from any automation, dashboard, or voice command. - Binary sensors for each station and program showing whether it is currently running.
- Services to run a station for N seconds, run a program, pause the whole system, set a rain delay, and set the water level percentage.
- Sensor entities for the rain and flow inputs, if you wired them.
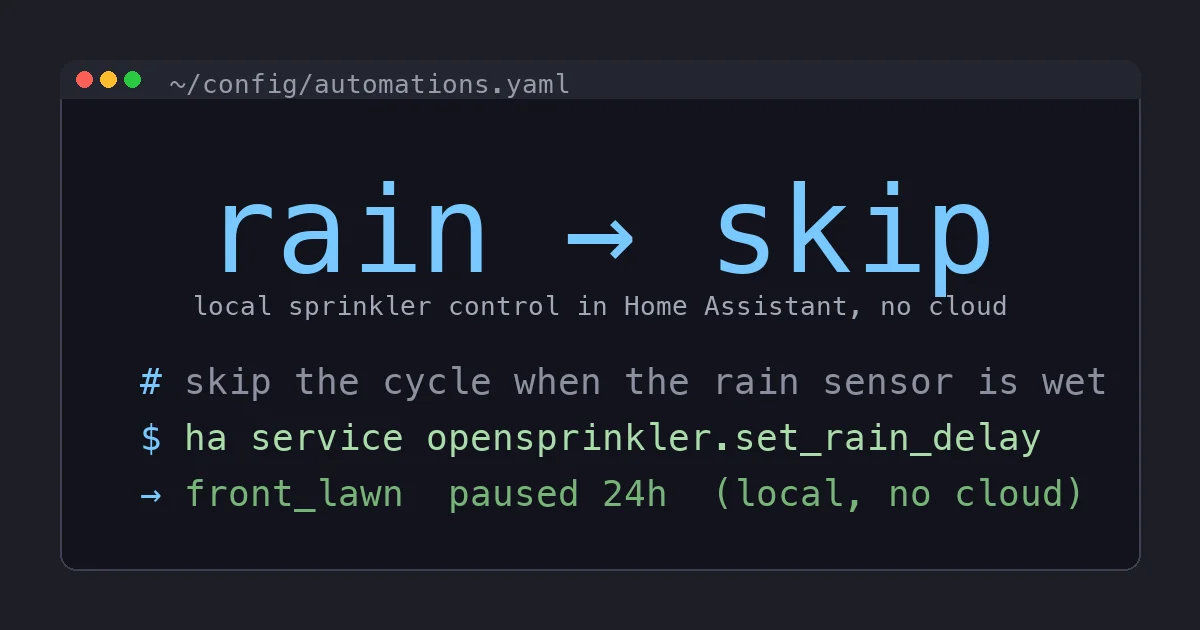
Now the yard is a first-class Home Assistant citizen, and the decisions move into my own automations where I can see and version them. Here is the rain-skip automation that started this whole project, written the way it should have worked from the beginning:
alias: Skip sprinklers when it is actually raining
trigger:
  - platform: state
    entity_id: binary_sensor.opensprinkler_rain_sensor
    to: "on"
action:
  - service: opensprinkler.set_rain_delay
    data:
      rain_delay: 24
  - service: notify.mobile_app
    data:
      message: "Rain detected. Sprinklers paused for 24 hours."
That fires off a physical sensor on my own hardware. No forecast, no cloud, no eleven minutes of watering a puddle. If the sensor is wet, the cycle is delayed, full stop.
Step 4: The Flow Sensor Is the Real Upgrade
If you take one optional thing from this post, make it the flow meter. Wired to OpenSprinkler’s SN1 port, it reports actual gallons per minute, and that single number unlocks the automation I care about most: catching a broken system.
A cracked lateral line or a valve stuck open will happily dump water for hours and you will find out via the water bill. With a flow reading in Home Assistant, I know the normal flow for each zone (the front lawn pulls about 9 GPM, the drip beds pull under 2). So I can alert on anything abnormal:
alias: Alert on abnormal sprinkler flow
trigger:
  - platform: numeric_state
    entity_id: sensor.opensprinkler_flow_rate
    above: 14
    for:
      minutes: 2
action:
  - service: opensprinkler.stop_all_stations
  - service: notify.mobile_app
    data:
      message: "Sprinkler flow too high. Possible broken line. System stopped."
Flow above 14 GPM for two minutes means something is wrong (no single zone of mine draws that much), so the system stops itself and pings my phone. A cloud controller can offer a version of this. Mine does it on the same box that runs the valves, and it keeps working if the internet does not.
Where the Cloud Controllers Still Make Sense
I am not going to pretend OpenSprinkler is for everyone. If wiring a controller and installing a HACS integration sounds like a bad Saturday, the Rachio 3 is the finished, boxed, tap-and-go version of this, and its flex scheduling really is smart. If you want the same convenience for less money and can live with a slightly less polished app, the Orbit B-hyve XR is the budget pick and it also works with existing valves. Both are fine buys for people who want the outcome without the build.
But understand the trade you are making with either one: the intelligence is rented, the integration is cloud-polling, and the rain skip that matters most is a decision made on a server. For me, after watching my old controller water a thunderstorm, that trade stopped being acceptable.
The Bottom Line
OpenSprinkler plus Home Assistant is the sprinkler setup I should have built years ago. It reuses every valve in the ground, it puts every watering decision on hardware I own, and it turns a dumb timer into something that skips real rain, catches a broken line before it floods the yard, and answers to my automations instead of a subscription. The controller is about $130, the flow sensor and rain sensor are cheap add-ons, and the payoff is a lawn system that does not care whether a cloud is having a good day.
If you already run Home Assistant and you are still trusting a rented brain to water your yard, this is one of the highest-satisfaction weekend swaps on the board. Buy the OpenSprinkler, keep your valves, and move the decisions home where you can see them. If you would rather buy the easy path, the Rachio 3 is the honest recommendation, cloud and all. Just know which one you are choosing, and why.